Showing posts with label Valentine's Day. Show all posts

Valentine's Day heart ornament or bowl filler {tutorial}


A cute little addition to your Valentine's decor and a great way to use up some of those scraps! :)

Supplies:
Fabric
Jute or twine
Filler
Needle, thread and pin
Embroidery thread (optional)

How to:
Cut two hearts. (Mine are about 4 inches wide.)  Cut a piece of jute about 7" long.  Pin jute upside down to the right side of the fabric, then place second heart over the top and pin in place, right sides together.  (You're making a teeny-tiny pillow!)  

Sew around the edged, leaving about 1 1/2" open...
 ...so you can turn right sides out and stuff.
Hand sew closed.  

Make some more in fun Valentiney colors.


 You can even stitch some XOXO's on with embroidery floss!
 I made one out of leftover cream burlap.  This one I just sewed together leaving the raw edges out.
Toss them all into a cute bowl.
 Or hang them on some branches.

Valentines Applique {Quick Tutorial & SC #7}


Supplies:
Fabric
Wonder Under
Scissors
Sewing machine optional


Directions:
Fuse fabric to WU (according to directions which come with the WU.)
Cut your shape out.
Peel backing and place on shirt.
Iron again (follow directions for iron settings)

Optional:
Sew along edges.  You can straight stitch or zig-zag.  
The heavy duty wonder under says no sewing, but in my experience the edges will eventually come up with general wear and washing, so sewing is an extra step that will help it stay.

This is really how my "photo op" went.


Happy Love Day!

Valentines Day Food

Too Cute!


We will be doing this for Valentines day dinner!!!
(4 small kids + school night = no romantic dinner for me.)

And this for dessert:


From Bakerella (of course!)

Simple Sewn Heart Card {tutorial}

I love to play with paper and I love to sew.  What's even more fun....sewing paper!


Punch your hearts out of scrap paper and card stock, line 'em up, and sew 'em on.  Easy peasy.

I tend to temporarily adhere the punches to the card so they stay straight.  I even use a ruler, cuz I'm a bit obsessive particular about these things. 

You can do this with any shaped paper punch.  I've made them from butterflies, flowers, and stars.  Its a quick, easy, and a great way to use up your scraps!

Valentines Felt Topiary {tutorial link}


The Idea Room has a link (sorry for the link to a link :) to the tutorial for this.  When I picked up the urn antiquing last summer, I was originally going to make and put a moss ball in it.  (I never did get that done!)  Instead, here is a quick felt topiary.

The only changes I made...
I only did the top half o the ball, knowing I was going to put into this urn and
I used my die cut machine to cut all the circles.


Button Heart Card {quick tutorial}

A smaller version of the Valentine Button Canvas in a card.


Grab your card blank (I'm a huge fan of Kraft paper lately!)
 Trace/draw a heart (you can draw right on the card because it'll be covered up)
Dry fit your buttons
Put them on with glue dots.

You could make these in any shape for any holiday.  Stars, 4 leaf clovers, balloons, pumpkins, flowers...let your creativity flow!

Heart Punch Art {tutorial}


 A fun way to use up those scraps!  This could be done with any punch really...crowns, butterflies, flowers, you name it!

Supplies:
Scrap card stock
Paper punch
Frame (from Dollar Tree)
Spray paint (optional)
Card stock
Pop dots
Ruler (if you're picky, like me)


How to:

Raid your scrap drawer for all card stock red or pink (or whatever color you want).


Spray your frame (if it needs it.)  I spray this at the same time I was doing this one.

While your frame is drying, cut white card stock to fit frame, the punch a handful of hearts.

Put pop dots on the back of punched shapes and line them up.  (I used a quilting ruler on the top and sides.  Put the corners in first then worked my way in.)  

Pop it in the frame, without the glass.


I tried to get a pic of the dimensional-ness (technical term).  


Give it to the hubs on Valentines day!

Valentines Day Art - Button Collage Tutorial


This originally started out as an idea to do our monogram...on a pillow.  As you can see, that didn't happen...but it will.  :)  I just didn't have the time to hand sew on this many buttons nor did I have this many of the right color buttons

Supplies:


Ugly frame
Spray paint (not pictured)
Buttons
Glue gun
Canvas

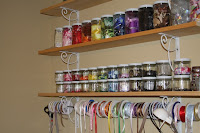
This project was kinda free (can't beat that!) as I had all this stuff around the house.  The frame was a castoff my hubby tied to donate.  I, of course, snagged it out of the box....with his objections.  (No vision!!! :)  The canvas I picked up at a yard sale this summer, buttons I have a ton of (see next pic of my unfinished embellishment center), spray paint left over from this project, and my trusty glue gun.


(I do need to paint and edge the shelves.  Its on my list.)

How to:


See ugly frame?  This is why the hubs tried to get rid of it.  I saw the potential.  After 4 coats of spray paint (ugly spotted gold is hard to get rid of!) it became red.


Dump buttons out.  Form into shape.  Decide on a cute heart!


Find, enlarge, and print out a heart (or you could actually just draw one!)  Fold in half, cut out, open it up and tape it down to the canvas.


Dump out the pile of buttons, and start gluing down the outside line.  When that's done, you can pull off your template.


Enjoy putting your puzzle together and start filling in the shape with buttons.


When its done, you'll have lots of little glue hairs to pull off.  They scrape off pretty easy from the buttons, just use your nails....before your manicure of course.


Pop it in the frame!  Enjoy!


Go show your hubby.  Explain to him that this was all done using supplies you already have.  Shake your head when all he can say is "and why do we have so many red buttons?"


Happy Heart Day!


LinkWithin

Related Posts Plugin for WordPress, Blogger...