Headboard is {almost} done


I had to take advantage of the break in the freezing weather to paint.  The temps around here went from 40's to 70's and now were back to single digits....in a matter days.  Cra-zee!!!  

Here's the before


Originally I had been planning to make Ana White's Farmhouse bed.  We bought all the wood (true to her directions it was $120..which is a steal compared to the umpteen-hundred that PB is selling theirs for!)  I bought it about 6-7 months ago and it sat and sat and sat and sat in our garage.  

A couple of weeks ago a friend and I wandered into a shop selling used furniture and I found it.  The {almost} perfect bed.  It had a decal and was missing a foot board, but that's OK, especially since they only wanted $25 for it.  I think I actually giggled.  Solid wood.  I knew what a $5 can of spray paint could do to it.  So I bought it.  $30 is a lot better than $120, which was already much better than umpteen-hundred.  

I did the normal sand, prime and spray paint (I *heart* spray paint!), and then I lightly glazed it to tone down the bright red.  I love it!  I was originally going distressed white, but changed my mind to red at the last minute...and so glad I did.

When I put it behind the bed, the mattress looks a bit low, so I'll mosey on over the Lowes and grab some bigger wheels/risers for the bed.

Now I just need to finish the bedding....that'll be another post! :)

Edited to add:
I'm so excited!  I just found the matching footboard on Craigslist.  Ha!  Someone is selling just a footboard AND it matches!!!

Tshirt to tunic {SC#5}

Browsing "I am Momma Hear Me Roar" awhile back I can across this up-cycling t-shirt to dress tutorial.  Since I'm all about not throwing things away (hoarding is what the hubs calls it) I have lots of tshirt material.  (Just between you and me.....when I know he's getting ready to take a box to donation, I go through it before he loads it into the car.  I find all sorts of fun stuff that I sneak take upstairs to my "office.")
I also have 4 kids that are growing like weeds, and destroying clothing in the process.  My 5 year old came to me one morning with a shirt on that I knew was not suppose to show her belly, but she cried when I told her she had to change.  She loves the shirt and the cute embroidered ladybug on the front (which I kept).  So...I told her I'd fix it.  And I did.

Here it is now.  (Do you think she likes it???)
She's posing all on her own!  No prompting from me at all.  She even asked if she could sleep in it tonight! (Notice another pair of patched jeans?  I told ya my #1 was rough on them, so #2 gets all the patched jeans!)

Honestly, it took me longer to re-thread one of the needles on the serger than it did to sew this up.  I'm new at serging, so am really trying to like it.  (Its not working so far...)  It would have been much easier to just sew the shirt up with a straight stitch on my machine.

We are totally into the tunic and jean/leggings look at our house and this fits right in.  I'll be doing it with more of the girls clothes, I'm sure!

Jute wrapped pears

Love.  Them.

Would you expect anything less from BD?

I know the Dollar Tree has smaller (normal size) pears, but will be looking at Hobby Lobby for bigger ones.  (Pretty sure they have paper mache ones.)

All you'd need is jute twine and a glue gun and off ya go! :)

Heart Punch Art {tutorial}


 A fun way to use up those scraps!  This could be done with any punch really...crowns, butterflies, flowers, you name it!

Supplies:
Scrap card stock
Paper punch
Frame (from Dollar Tree)
Spray paint (optional)
Card stock
Pop dots
Ruler (if you're picky, like me)


How to:

Raid your scrap drawer for all card stock red or pink (or whatever color you want).


Spray your frame (if it needs it.)  I spray this at the same time I was doing this one.

While your frame is drying, cut white card stock to fit frame, the punch a handful of hearts.

Put pop dots on the back of punched shapes and line them up.  (I used a quilting ruler on the top and sides.  Put the corners in first then worked my way in.)  

Pop it in the frame, without the glass.


I tried to get a pic of the dimensional-ness (technical term).  


Give it to the hubs on Valentines day!

From Shirt to Skirt {quick tutorial and SC#4}

We have 4 kiddos.  3 girls, so lots of hand me downs that I'm ok altering to last a little longer.  This shirt, I loved the color combo, but the way it is (was) constructed makes it a little hard to get on a squirmy 11 month old.  So...I made it into a skirt.


I thought this little ruffle at the bottom was so cute.  (Pardon the un-iron shirt...that's one thing I don't do much of around here!)


The whole process took about 15 minutes.

Supplies:
Shirt
Scissors/Rotary cutter and mat
1/4" elastic (or whatever you pull from your leftovers)
Safety pin
Sewing machine

How to:
Cut shirt from armpit to armpit.    I wasn't too worried about the length of the skirt, since I planned on her wearing them over the leggings that came with the shirt (those still fit.)


Fold in and hem just wider than you elastic.  (Knit doesn't fray, so this is a crude hem job with no turning under.)  Leave about an inch open at the back to insert your elastic.


I grabbed a pair of the little punkin's pants to measure (she was already asleep I couldn't measure her waist) and cut the elastic.  Put your safety pin through the end of the elastic and pin, then thread through your waist band.  Overlap the elastic and secure with a zig-zag.

Either close up the waistband with your machine or hand stitch closed.

Done.


 Trying to take a picture of a skirt on an 11 month old who prefers crawling to walking was not the easiest.


This is what happens when she sees the camera. 

Attack of the baby.


EAT - an easy wall art tutorial


From this.................................to this


Saw this somewhere.  Pottery Barn?  Another blog?  A restaurant?  All of the above?  
Loved it...so I made it.  Thats how I roll.

Supplies:
Letters (Hobby Lobby, $10 each, but get 'em on sale)
Spray paint (or don't and leave them gold.)

Yup.  That's it.


Note: Do not multitask when carrying letters outside to paint...especially when you're walking over concrete.  If you happen to be clumsy and drop one (not admitting anything here) then this just might be what your "A" looks like:


Luckily I'm painting them, huh? :)

So, pick a color and spray 'em.


Let them dry.  Luckily with spray paint its a short wait.

Get some of these bad boys (or use nails if you prefer) to hang them up.


My kiddos think this hilarious.  "Eat.  In the kitchen.  That's what we do," they say.  Then they asked, "are you going to put *poop* over the potty?"

TMI?  

At least they are spelling! :)

Appliqued Patching Jeans {tutorial and SC3}

From this............................to this!

My oldest child is a little rough on her clothes, so we end up with a lot of peek-a-book knees.  The rest of the jeans are fine, but the knees on every. single. pair. are torn.  So...I patch them.  I use to sell patches and appliques in my Etsy store so have my pick left over from what I never listed.  I prefer decor fabric for knees because they will last longer.  

Supplies:
Holey jeans (check)

 Fabric
Wonder under
Iron
Pencil
Scissors
Optional: embroidery thread and needle

How to:
Figure out what shape you want.  Cut a piece of wonder under a little bigger than your final shape, and a piece of fabric a little bigger than your wonder under.

Iron WU onto fabric per included instructions.  Flip it over and trace or draw your shape onto the back, then cut it out. 

Iron all those little loose threads on your jeans flat.  If you have a hole, then you'll need to put a piece of wax paper beneath the hole so that your wonder under doesn't bond to the inside back of jeans! :)  If its just a lot of threads, you'll be fine without using it.  

Peel backing of your patch, place over knee and iron on following instructions.

With that, you can be done, but you can also take it a step further and sew the edges of the patch.  I use heave duty wonder under that says "no sewing needed" but it still could use it.  The patch will eventually pull away...or maybe that's because my child plays too rough and then picks at them???


I used three strands of embroidery floss and did a quick whip stitch around the edge.  I've blanket stitched some, I've done a running stitch on some. 

#2 couldn't wait to get them on, princess dress up shoes and all!  Too bad school is out today for snow.  She wanted to show her friends her cute new jeans!

Wall art


I ripped this picture from a magazine years ago (can't remember name of said magazine) vowing to someday do this to my walls.  (I am also in love with the brown hounds tooth check!)  The lettering on the wall is fantastic.  Maybe in our next playroom?

Hot Therapy Pack - SC#2 {tutorial}

Its cold and flu season (Yay....not!) and that means ear infections for my kiddos.  One thing that seems to help is to have a heating pad on their ear, but I don't want them to sleep all night laying on one plugged into the wall.  So I've improvised.

This one is for  one of my girls and I made it out of a princess print flannel.  (Note: I would not use flannel again, as it kind of pills up with use.)


You just pop it in the microwave for about 45 seconds and its done.  It slowly cools, so they are able to fall asleep and I don't have to remember to go turn off the heating pad.  (Its also great for growing pains.)

Supplies:
Fabric (preferably a cotton, ticking weigh is good)
Rice
Flax seed (optional)

How to:
(I'll take pictures and post the next one I make one.)

Figure out what you want for your finished size (this one is a 5"x5".)  Cut two pieces at 5 1/2"x 5 1/2."

Putting right sides together, sew around the opening with a 1/4" seam allowance, leaving an opening of 1 1/2" on one side.

Clip corners and turn inside out.

(If you're impatient like me, skip this next part.)

Iron seams.

Top stitch around the outside using about 3/16" seam allowance, still leaving that 1 1/2" opening.  When you start and stop this, you'll want to back stitch to secure your stitch.

Using a funnel, insert it into the opening and fill white (uncooked) rice or a combo or rice and flax seed.  You can use rice only, but eventually it will clump together.  (Not sure if "eventually" is after years or months, but that is what "they" said when I googled it.  Not sure who "they" are either, but there was more than one "they".... :)  Flax seed apparently stops the rice from clumping.  I could go into more detail but y'all just want to know how to make them, not the science behind it!

I filled until 3/4"-1" from the top.  I took a longer pin and weaved it across the top (a picture here would really help, sorry!) to keep the rice/flax away from where I was sewing to close.

Top stitch the opening closed.

Valentines Day Art - Button Collage Tutorial


This originally started out as an idea to do our monogram...on a pillow.  As you can see, that didn't happen...but it will.  :)  I just didn't have the time to hand sew on this many buttons nor did I have this many of the right color buttons

Supplies:


Ugly frame
Spray paint (not pictured)
Buttons
Glue gun
Canvas

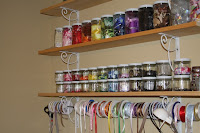
This project was kinda free (can't beat that!) as I had all this stuff around the house.  The frame was a castoff my hubby tied to donate.  I, of course, snagged it out of the box....with his objections.  (No vision!!! :)  The canvas I picked up at a yard sale this summer, buttons I have a ton of (see next pic of my unfinished embellishment center), spray paint left over from this project, and my trusty glue gun.


(I do need to paint and edge the shelves.  Its on my list.)

How to:


See ugly frame?  This is why the hubs tried to get rid of it.  I saw the potential.  After 4 coats of spray paint (ugly spotted gold is hard to get rid of!) it became red.


Dump buttons out.  Form into shape.  Decide on a cute heart!


Find, enlarge, and print out a heart (or you could actually just draw one!)  Fold in half, cut out, open it up and tape it down to the canvas.


Dump out the pile of buttons, and start gluing down the outside line.  When that's done, you can pull off your template.


Enjoy putting your puzzle together and start filling in the shape with buttons.


When its done, you'll have lots of little glue hairs to pull off.  They scrape off pretty easy from the buttons, just use your nails....before your manicure of course.


Pop it in the frame!  Enjoy!


Go show your hubby.  Explain to him that this was all done using supplies you already have.  Shake your head when all he can say is "and why do we have so many red buttons?"


Happy Heart Day!


LinkWithin

Related Posts Plugin for WordPress, Blogger...